
How to Make a World War 2 Diorama - Part 3 Making the terrain features
In this part of the tutorial I show you how to begin making the terrain features like the grass, roads, trees etc. I show you how to paint the basecoat of colors and how to set the major terrain parts in place. These major terrain parts are things like piles of sandbags and ruined building structures.
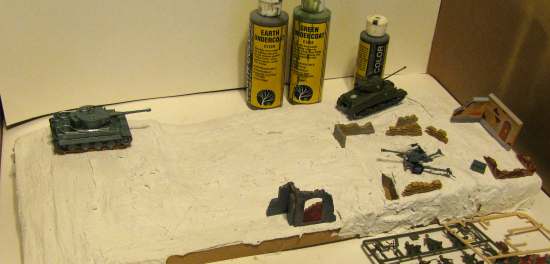
The following picture shows what we do next with this diorama. Take all the various parts, models and miniatures that you intend on putting in it and lay them out on the scene. Refer to the sketches that you have made of this diorama. This way you get a good idea of what it will really look like.
This is the time to make changes. Move the parts around and look for interesting arrangements. The more you do this the better the diorama will turn out. Just by moving the various pieces around you will see new configurations and arrangements. It is amazing some of the new ideas you will get.
 Note from Will: I also have this section of the tutorial as a video you can watch. It is at the bottom of this page.
With a pencil draw light lines around the various objects and draw in the different land and terrain features like water bodies and roads. You want to point out any parts of the diorama that vary in base color. I will explain a little bit more about base color.
Painting The Base Colors
You have a good understanding of all the various terrain components now and you know exactly where they all are. What you should do next is lay down a complete coat of base paint over the whole diorama. This base coat mimics the final colors on the diorama. For example, any sections that will grassy will have a base coat of green or light green. Dirt roads will have a dirt color, city sections might have a grayish color. Areas around foxholes and trenches might have a dirt brown or a sandy color.
A couple of important points about painting the base colors
- Be sure to cover the whole diorama with paint - don't let any of the white plaster show through
- The base color is just a base that shows through the terrain materials just a little bit so you don't have to be exacting with this
- Vary the colors, don't just do a plain color. For example if you are painting a large grassy area don't make it all exactly the same shade of green, some of it should be plain green and then for some of it add just a hint of white so the shade is just a hint lighter. This adds a level of realism to the diorama.
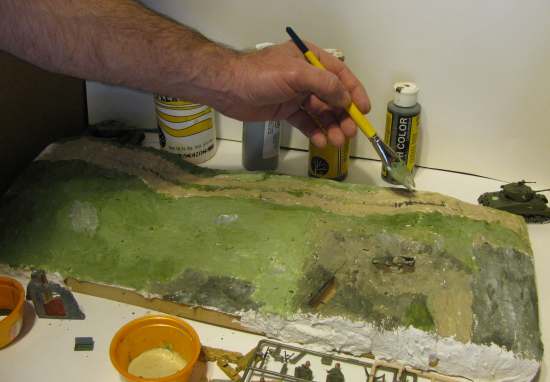
In this diorama there will be the edge of a forest on the left. At this left edge I used a dark green then as I painted more toward the middle of the diorama I added small amounts of white to the paint. This gives it a nice and subtle lightening as the grass progresses out into the open and sunlight.
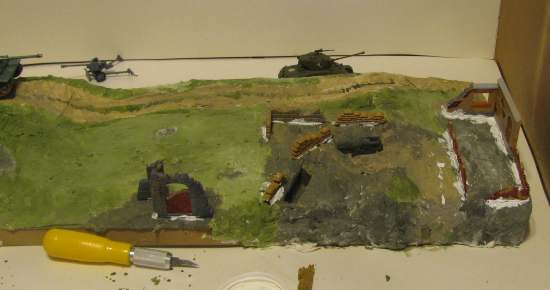
In the picture below I do some of the initial painting with the various models and miniatures still in place. This is just to get a feel for the colors. Start out this way to seed the colors and get the scheme correct.

Remove the pieces from the diorama and complete all the painting. If you have a dirt road in your diorama you might want to run a ragged patch of dark color down the middle of it. This is how a lot of these roads appear. The tires and tracks don't run over this section so it will look a bit different.
Vary up the colors a little bit. Don't have whole swatches of even colors. Notice how the color fades and changes around the trenches.
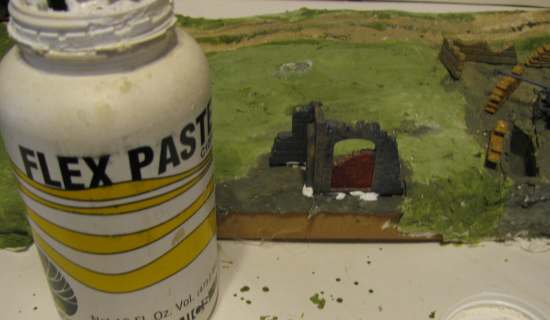
Once you have finished with the painting, and it is dry, you should glue down the various landmark type parts of the diorama. I have glued down the building pieces and sand bags but not the tanks or the anti tank gun. I used a product called flex paste. This works really well to glue uneven pieces together or to glue pieces onto uneven terrain. It has a very thick consistency that will fill gaps. You don't have to use flex paste you can use other types of glue including plain old white glue.
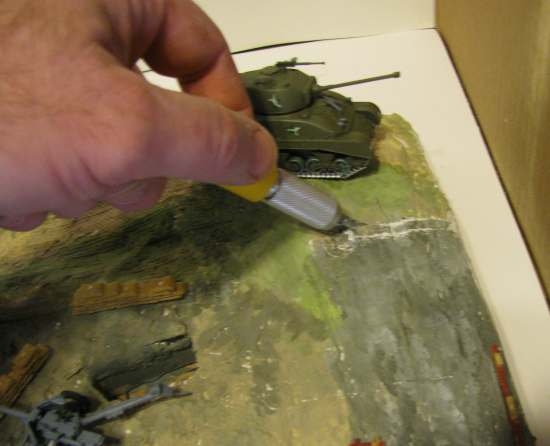
To get some parts to fit smoothly onto the diorama you can cut away some of the plaster. I have cut small grooves in parts of the diorama so the ruined building walls will stand straight.
Once the glue has dried you can do touch up painting to make it all blend in.
![]() Let's continue with the tutorial
Let's continue with the tutorial
Here is the Video for this part of the tutorial
Scene-A-Rama Kits
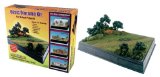
Scene-A-Rama Basic Diorama Kit - Use this kit to create a flat, landscaped surface for your project. It includes everything you need to make plains, prairies, grasslands, farmlands, woods and meadows.
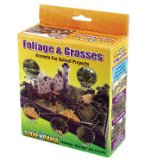
Scene-A-Rama Bushes, Foliage & Grasses Kit - Use this kit to create short and tall grasses, weeds, bushes, shrubs, hedges, ivy, flowering plants and roads and paths.


- Index
- What is a diorama?
- A short history of Dioramas
- Diorama Books
- Painting Miniatures
- Diorama Ideas
- Diorama Examples
- Diorama Making for the artist
- Diorama Making supplies & Tools
- Dioramas by Web Visitors
- Printable diorama box
- Diorama Images
- Diorama Making Videos
- Diorama words, terms and definitions
- Waterfalls and water in dioramas
- Dioramas Made by Charles
- Dioramas Made by Joseph
- Dioramas made by Marshall
Will's Big Diorama Projects
- The Wall Diorama
- Storm The Castle Diorama
- The Medieval Village
- The 300 Diorama - Battle of Thermopylae
Types of Dioramas to Make
- Paper Dioramas (Tatebanko)
- WW2/Fantasy
- Action Figure Diorama (IronMan)
- Egyptian Diorama
- Military Dioramas
- Jack and the Beanstalk
- The Secret Grotto Diorama
- Make a waterfall diorama
- How to make a waterfall
- Rock Climbing diorama
- How to make a Paper Mache Diorama
- Diorama inside a lightbulb
- Insect Maker Diorama
- Mississippi River with Indians
- Really creative shoebox diorama
- Dinosaur Diorama
- Make a secret diorama
- Wildlife Diorama (African Oasis)
- Firefly Diorama with real blinking lights
- Rainforest Diorama
- Ocean Diorama
- Shadowbox diorama
- Make a shoebox diorama
- Massive Castle Diorama
- Diorama Examples
- Polymer Clay
- The Battle of Thermopylae Spartan Warrior Diorama - A tutorial
- HALO Diorama
- Wizards Tower Foam Diorama
- Cemetary Diorama
- Trench Warfare
- Simple Nature Diorama
- Water Woman Diorama
- WW1 Diorama submitted by a web visitor
- Christmas Holy Land Diorama submitted by a web visitor
- New and easy Rainforest diorama
- New Section: Making WW2 Dioramas and Miniatures
- Castle Siege Diorama project
- Easy water scene diorama making
- Roman Bath
- Colonial Times Diorama
- Desert Diorama
- Tree diorama that changes over time
- Make a Triarama
- Bridge with Dragon
- 3 Succubi Fantasy Diorama
STORES
- Woodland Scenics Terrain Materials
- Revell Model Kits
- Tamiya military Models
- Woodland Scenics Turf and terrain Materials
- Diorama Making Books
- Diorama Kits
- Scene-A-Rama diorama Kits
- Plastic Scale Dinosaur Diorama Kits
- Harry Potter Dioramas
- Diorama Foam
- Conflix Medieval Buildings for Dioramas and wargaming
- Tatebanko Paper Dioramas
- Woodland Scenics Grand Valley
- Woodland Scenics rolled Grass -(RG)
- Diorama Accessories
Plastic Models
- Tiger Tank 1/72 Scale
- Sherman Tank 1/72 Scale
- How to make plastic models: Tips, Tricks and techniques
- Painting Miniature German Soldiers (1/72 Scale)
- Painting Miniature American Soldiers (1/72 Scale)
Check out the Diorama and Miniature store
*Short Diorama Tutorials*
- Pencil shavings into terrain textures
- Use Plexiglas to make bodies of water
- How to make bricks
- Make Water Effects
- How to make a waterfall
- How to make snow for your diorama
- How to Make realistic tufts of grass
- How to make trenches
- Terrain making with foamcoat
- Creative terrain shell making
- How to make Miniature Trees
- How to Make rubber rock and wall molds
- Motorize a drawbridge on your diorama
- Using foam to make a diorama
- How to make good looking rubble using cork
- Creative Shoebox Diorama Ideas for School
- A foam based diorama with water from start to finish
- Some great WW2 diorama trench making tips with video
- How to make plastic models- Tips tricks and techniques
- A look at some diorama buildings
- How to make barbed wire
- How to make mud in a diorama
- Diorama Tip - plastic models and resins
OTHER PROJECTS
Make a cardboard Samurai Sword
Make a Cardboard Medieval Shield
How to make a fantasy shadowbox
---------
All Materials, unless otherwise stated are Copyright©2001-2015
Kalif Publishing and StormtheCastle.com

Hi, Thanks for visiting my website. My name is Will and if you have questions
or would like to
contribute you can
---------
