This diorama is in honor of the Dragoons of Angola (Portuguese: Dragões de Angola ) in which I had an uncle that was assigned to the unit. It was a special horse unit of the Portuguese Army that operated in the Angolan War of Independence against a number of guerrilla units that sought independence from Portuguese colonial rule. The unit was raised in 1966 and was disbanded in 1975 due to the events of the Carnation Revolution in Lisbon, which ended the Portuguese Colonial War and granted independence to Angola, Mozambique and Portuguese Guinea. 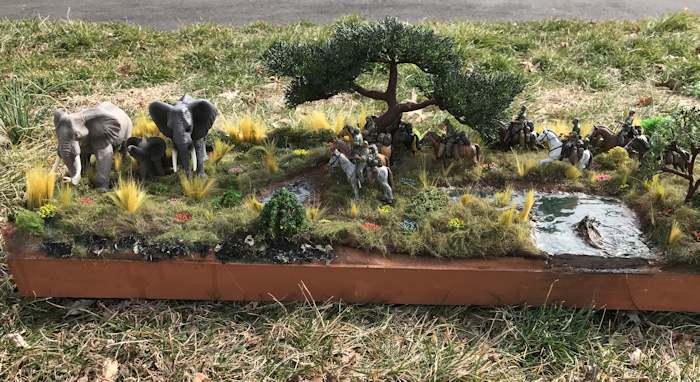
In military history, it was probably one of the last units of real dragoons (mounted infantry) to be used in combat operations, excluding the Rhodesian Grey's Scouts. A similar unit was being raised to operate in the Mozambican War of Independence, when it ended in 1974. The designation "Dragoons of Angola" was just an honorary title. The official name of the unit was "Reconnaissance Group of Angola" until 1968 and then "1st Cavalry Group". 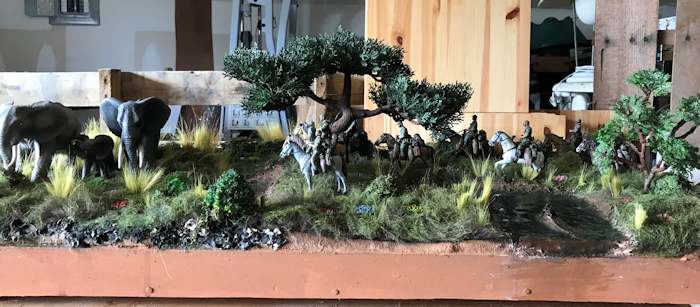
Want to see a larger picture of this diorama? I have one right here. (You can scroll around on the picture and get a good look at the details.) This project took me 5 months to complete for I worked on it a little bit everyday. I first started with the horses and trooper. Then the animals, and the base along with the vegetation right after.
A Note from Will: In this tutorial we will look at several different aspects of the diorama. First we look at the horses and the troopers and the various modifications that Luis has made to them. Then we will look at the animals. And we finish the tutorial by taking a look at the landscape, trees and terrain.
1. The Horses and Troopers 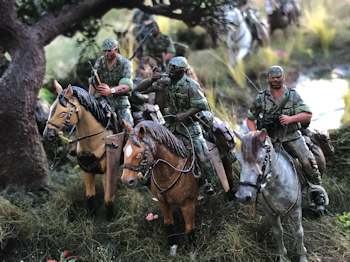
Horse and Troopers - the horses were right out of the box from various 1/35 scale kits that had horsemen, which was the majority German WWII horsemen because their equipment was about the same as the Germans for the Portuguese bought a lot of German military equipment since 1933 for at the time it was considered the best around. This was the easy part. Compared to what came next.
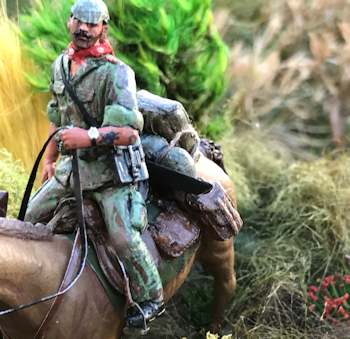
The troopers on the other hand was a different story. They took more time to put together. I will start from bottom to top. The legs and lower torso where part of the horsemen kits. The modifications were minor such as that I made side pockets as in the style of modern battle dress uniforms and had some of the troopers untuck their pant legs for all the kits have the soldiers pant legs tucked into their boots (see picture).
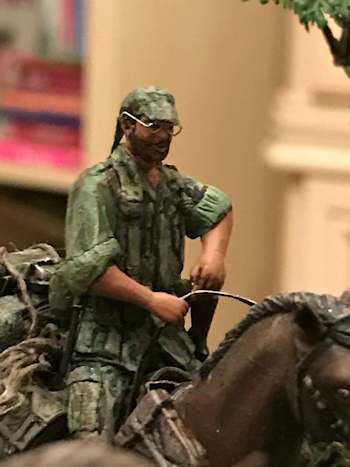
The upper torso came from several different kits (US and German Soldiers). The American Soldier's torso were not modified for the Portuguese used American WWII/Korean War era equipment due to US commitment to NATO. As for the German torso, that needed modifications. I first scraped off all German emblems and badges that were molded into the torso. I then had to start carving out the uniforms (not the equipment) to transform them into modern combat uniforms. The last part was the neck area, German WWII uniforms used a button up collar, so I had to completely carve up the neck area and used mili- putty to work in a new opened collar as seen on modern fatigues. As for the heads, I used a variety of them from different kits to fit what I wanted them to do such as looking up into the tree, drinking or chatting. None of these soldiers have a helmet, only soft caps, which were made with paper.
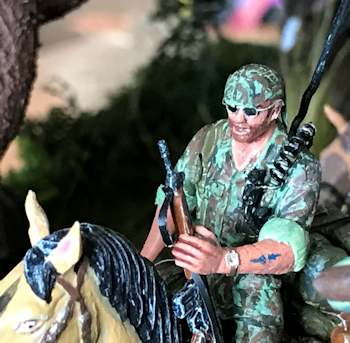
The paint scheme of Portuguese Army lizard style combat uniform during the Colonial Wars is olive green base, followed by dark green vertical streak of dark green, shadowed with light splotches but vertical streaks of red brown. Among the troopers there are some tattoos from Archer, glasses, sunglasses and watches from a Polish Company named ABER, which I bought them both from ebay ...
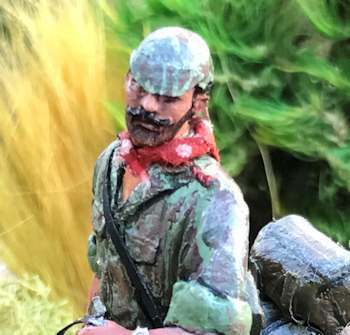
and a few extras like a bandana on one of the troopers (see pic), which was made of tissue paper.
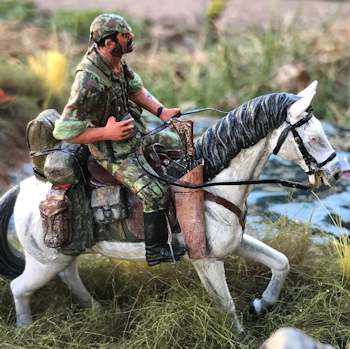
Trooper Equipment - is a mix of German and American gear that Portugal received from these two NATO allies. No modifications were made to the equipment. The only two add-ons were the horse burlap food sack which was made of mili-putty and a piece of a thread of rope which I pulled apart from a large gauge rope. The second piece of homemade equipment was the holster for the G3A3 Rifle of which the rifle was made by the German arms manufacture Heckler & Koch.
Portugal during the Colonial War bought 50% of its military hardware from Germany for the United States did not sell weapon and munitions to Portugal ? for it disagreed with Portugal's imperialistic policies and mindset. Historically, Portugal was the last empire to fall in 1975.
Anyway back to the diorama.
before I give an entire history lesson on the subject. The holster for the G3 Rifle which was made of leather in reality, was made for this 1/35 scale out of paper and painted a tan color washed with a brown followed by a white paint dry-brush. The G3 Rifles are made by MAIM miniatures (which are hard to get for they produce small amounts of their product) and Dragon MP-5/G3 set (which is also hard to get nowadays).
2. The Animals
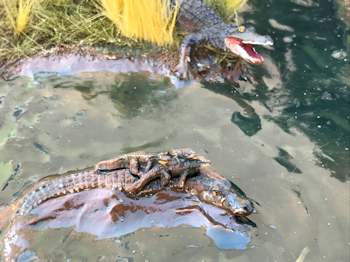
Animals - in this diorama (like many of my others) I used animals. In my 24 years of being a soldier and having been on several deployments, there are always some kind of animal around. In this one I used three elephants (two adults and a calf) crocodiles and several birds. The animals in this diorama is based on one of my several uncles who all fought in the Colonial Wars said that "...not only did we have to watch out for the enemy, but we had to watch out for the animals for we didn't want to scare them and provoke an attack especially when there were young ones around." He then added, "even though we had to watch for these big beasts, it was a beautiful site to see and a moment of peace in a time of war." Back to the diorama.
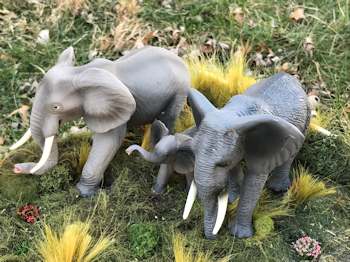
As you can see the elephant are from Safari, even though they come painted, I touched them up to make them more realistic, the same goes for the two crocodiles. As for the birds they are from two kits Reality in Scale and Mantis Miniatures.
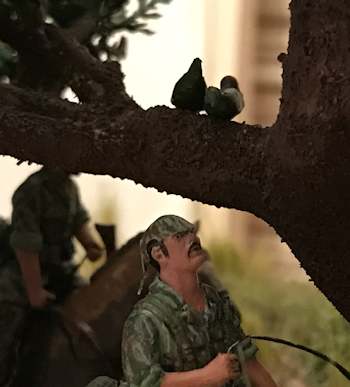
Two of the birds are on the tree while the other is flying. For the flying bird I drilled a tiny hole on to its side and glued a green wire (to camouflage against the back drop of the tree leaves) into it and then wrapped the other end of the wire on to one of the tree branches.
3. The Landscape, Trees and Terrain Diorama Base - is set in a Northern Angolan grassland in the onset of spring. The base is made from a bookshelf and the side are of balsa wood.
Landscape - was made of newspaper and plaster strips.
Grass - is simple, it is a big strip of fake fur I bought in a craft store. I painted it in a dark green and green. I then glued it to the base following the contours of the landscape. As from the bushes came from flower decorative fixings. Tall grass is from Woodland Scenics. Flowers from JTT
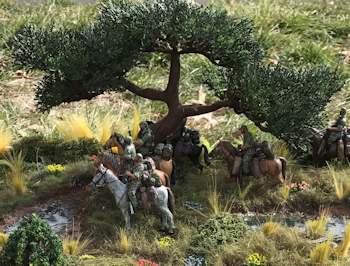
Trees - there are two trees; a large one and a small one. The large was all plastic I found in Michaels. But it needed a lot of work to make it more realistic.
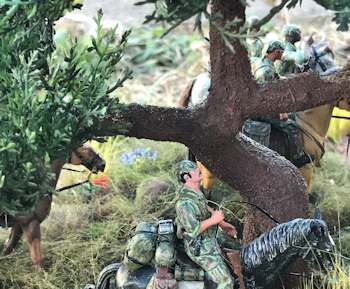
So I first spread glue all over the truck and branches and then sprinkled sawdust to give the bark a more realistic look. Once dried I painted it in black, then dark brown, brown and light brushing of light brown with a dry brushing of sienna. The leaves I painted them in dark green, then a light brushing of green and dry-brushing of light green. The same goes for the painting of the other tree. But before I painted the second tree I had to make one from scratch, which there are tons of videos online on how to make trees. One I made it, it was too thin and looked like a bundle of wires, so I add air drying modelling clay to make it look more woody and carved lines into the "bark".
Once dry I painted it. As for the leaves I used plastic leaves of fake flowers from a craft store and painted them and put them on the tree.

Water - resin with blue mixed with green paint to give it an algae look. But prior to the resin being poured I painted the base in a reddish brown color to look like mud. The final touch was the animal skull (see picture) from Mantis Miniatures. Once the base was completed I began to place the Troopers into a cavalry formation that was used by the Dragoons of Angola. And Voila!! It was done and show ready!  More Pictures of this diorama here More Pictures of this diorama here
RESOURCES
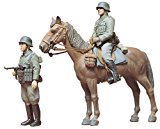
Tamiya 1/35 German Wehrmacht Mounted Infantry Set

Milliput Standard 2-Part Self Hardening Putty, Yellow/Grey
JTT Scenery Products on Amazon
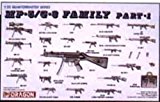
DRAGON MODELS USA 3803 1/35 MP-5/G-3 Family
|
![]()


