
Home

I have a youtube channel with over 700 Videos!


Wills Pinterest !


Hi, Thanks for visiting my website. My name is Will and if you have questions
or would like to
contribute projects or ideas you can contact me 
Building a German Grizzly Bear Tank (Brummbar)
|
|
Here is a fantastic little tutorial written by John. He does a whole lot of models and has been doing professional level work for over twenty years now. He has put together a nice tutorial on the art of making a military model tank.
This tank is the German Brummbar (Grizzly Bear). Although it is technically not quite a tank and not quite an artillery piece. He explains more.
My thanks to him for submitting this great tutorial with pictures!
|
He has a business called Hobbies in a Barn and you can check out the facebook page to see more pics and get more info: Hobbies in a Barn on Facebook
John has also done another Great diorama I have here on the site: Ambush at Iwo Jima
Before we get started let's take a look at the completed Tank
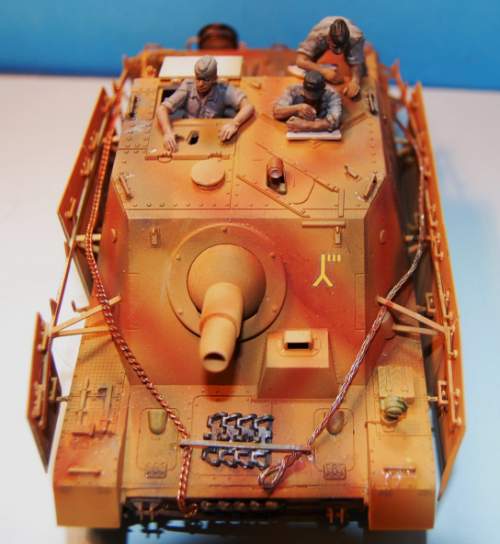
First off, this is no ordinary tank, based on what the Germans did to adapt certain tank chassis and drive trains
for specific jobs, the Bear is a production mix of just that sort of need. What the Bear lacked in horse power
it made up for in fire power. The 150mm assault gun packed a punch but the vehicle was overweight,
underpowered and could only carry a few of the huge rounds of ammunition.
Not quite a tank and not
quite a mobil artillery piece, the kit however is a great historical addition to anyone's model collection.
The Tamiya Brummbar or Grizzly Bear is one of the finest models in 1/35th scale that I have ever built.
Dragon 1/35 "Brummb�r" Sturmpanzer IV
 Alternatively called the Sturmpanzer IV, Sturmpanzer 43 or Sd.Kfz. 166, the Brummbär was an armored vehicle equipped with a 150mm StuH 43 L/12 gun. Brummbär, which means "grizzly bear" in German, was the nickname given to it by the Allies. Based on a Panzer IV chassis, this infantry support gun was especially designed for combat in urban areas. In December 1943, the superstructure, particularly the driver's position and periscope, and gun (StuH 43/1 L/12) were modified in order to reduce the vehicle's weight. The resulting upgraded vehicle was known as the Mid-Production Brummbär. The Brummbär saw action on the Eastern and Western Fronts, as well as in the Italian theater. Requires paint and glue (not included).
Way back in the days of Monogram Models the Brummbar as it was in 1/32nd scale-sort of was a hit with me as well,
now the improved model is the subject of this portrait. I have shown the steps that are necessary to complete the kit.
Before starting to build an model kit I inspect the contents using the instructions to insure that there are no missing or
broken parts as this is very discouraging.
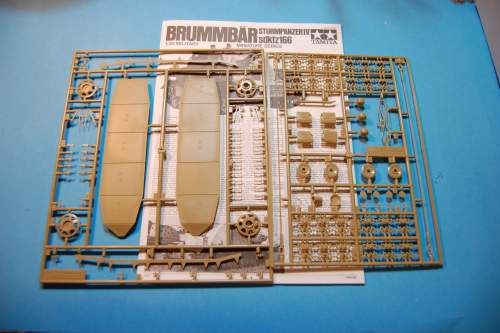
The first several photos show that by laying out the part trees one can inspect the parts and get ready to paint the parts
as it is much easier to paint the parts in this manner.
As I move onto the weathering stages the photos show the mud effect that I use which makes any military vehicle model
look more realistic, even if one applies just a small amount of weathering.
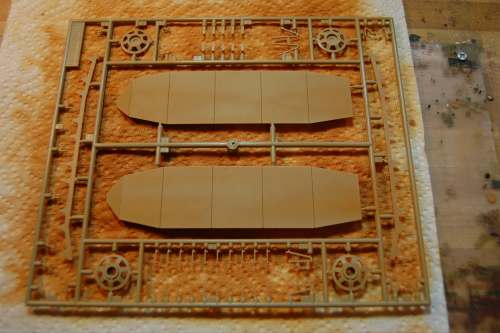
Clean military vehicles just don't pass muster
unless you show them coming out of the wash basin! My mud is a simple mix of thinned black acrylic paint hand brushed
onto the affected parts and then covered with powdered artist chalk. Mud sticks in many ways so let the chalk fall randomly.
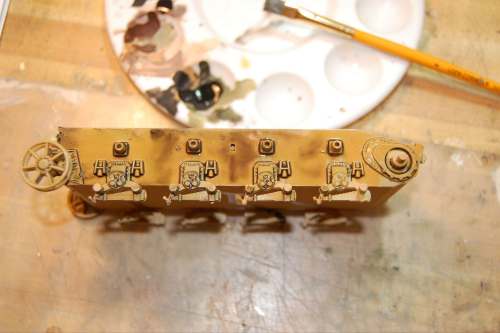
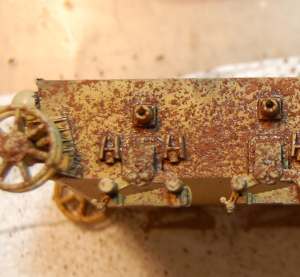
(Here is a closeup so you can get a look at that great weathering technique that John uses. This picture shows the model after it has been covered with the powdered artist chalk. It really makes a big difference. Weathering is a very important part of military modeling.)
This is John's Technique for applying the mud:
The method for applying the mud is easy; I apply a thin wash of black acrylic paint to the effected areas and scrape the chalk onto the still wet paint letting it fall randomly as mud is quite simply randomly sprayed onto vehicle wheels, tracks etc. I then dry the area with a hand held hairdryer set on LOW heat which sticks the chalk and black wash to the model.
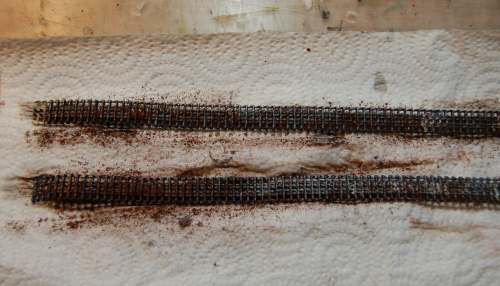
And here is a look at the weathered tracks.
 Okay, let's continue on with this tutorial and take a look at the camouflage and finnishing touches.
WWII Dioramas (Modelling Manuals)
Still the most popular subject for dioramas at any military modelling show, WWII gives the modeller the opportunity to try out his repertoire from burnt out buildings to weathered machines and men. This book explores the many facets of the subject and shows how composition is all.
A perfect combination of easy-to-follow text combined with comprehensive step-by-step photography make Osprey Modelling Manuals indispensable reference guides for modellers of all standards and abilities.
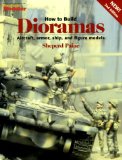
 How to Build Dioramas
 - Learn everything you need to know about making your dioramas look real! This fantastic revised edition will show you how with new projects, new photos, and expert tips. Includes painting, weathering, and detailing tips for figures, aircraft, vehicles, and more! 290+ photos with color throughout; 41 illus.; softcover

Do you like making projects and exploring a variety of hobbies?
Sign up for my free newsletter. I give you regular updates on hobbies and projects you can make. it is totally free and I don't share your email with anybody.
![]()


