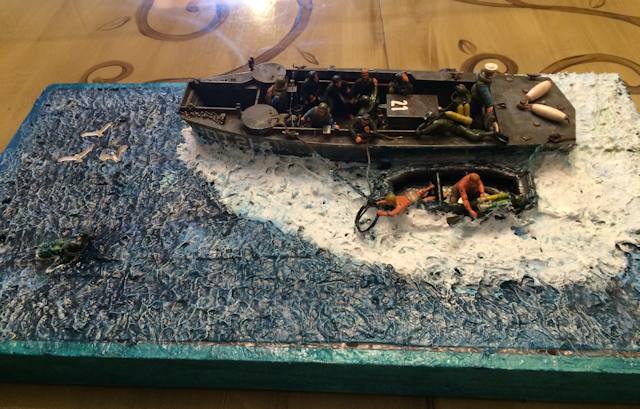

One of the things Will likes the best about this amazing diorama is the wet feel of it. Diorama makers often forget to make things "wet". Luis did a great job with this. And he used a clear gloss to achieve it.
Check out larger pics: I also have a page with lots of larger pictures of this diorama right here
First about the UDT Boat. It is made by Revell and it has been produced several times since 1967, I believe. The boat is straight out of the box but there has been several enhancement I made for it to look like the actual landing craft used by the UDTs during WWII, Korea and during the rest of the 1950s and early part of the 1960s. I added these additional items from pictures in books and on the internet. One such example is the ramp door chains, safety equipment (exp. Rescue hook was made from a tooth pick, putty and a staple), first aid kit and tires and so forth (See the picture and see if you can find the additions). The gun turrent covers were made of thin cardboard in which the model came in as a matter of fact, the cover's handles are staples.

I also add a radio, which came from a Heller Radio Operator kit and made the mike for it out of putty and an antenna out of a garbage bag twist. These are just a few examples of the additions added on to the boat. I also inked UDT 21 onto the life preservers and USN onto the sailors life vest and the number 21 onto the engine compartment hood.
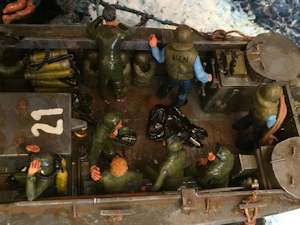
I also did some weathering of the boat. Being that these boat were heavily used in WWII. I made it look old and used by applying different washes, such as rust, oil and water streaks.
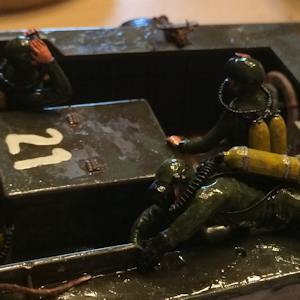
As for the Frogmen I used the ones that came with the kit, but one of them was transformed in the Frogman entering the boat from the raft. What I did was, I cut his arms at the elbows and got rid of the explosive he was carrying. Then I put him back together as if he was boarding the boat.
I also used figures from three other kits: 2 kits from Heller's Frogmen, Italeri's Radio Operator Kit, and Trumpeter's WWII USN LCM Crew
The Trumpeter I used one sailor (the one that is daydreaming looking out into the horizon). He was straight out of the box.
The next kits took some work. The first one is Heller's. I used two of their Frogmen kits. That took some work for they had on some gear which I had to cut off and scrap off to give them a basic wetsuit. I then put them together in different poses.
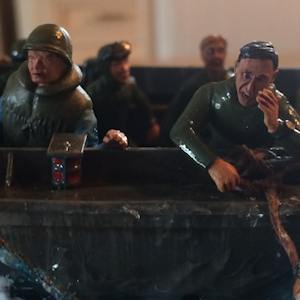
Of all the figures, one of them I did major work on, the figure looking over the side and shouting. With that figure, I cut wedges into the front knees and placed him over a flame and slow bent them, but was careful not to completely burn the plastic (here's a tip: if heating plastic to mold figure, don't bring it to close to the flame or it will melt, keep it at a distance and the heat of the flame will do the rest.) I then added molding putty to the bottom torso to make it bent over. And I used a different head.
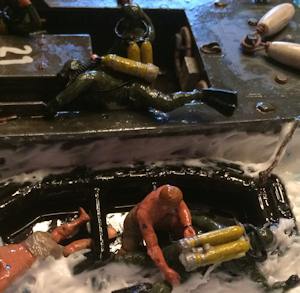
Scuba fins and scuba tanks were home-made: fins were made of modeling putty and tanks were made from the plastic that the kit pieces are attached to.
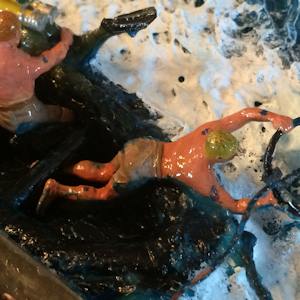
The final kit I used was a figure from Italeri's Radio Operator kit. Originally the figure was a uniformed soldier that was stripped down to only swim trunks and then I carved muscle into him and used a little putty. Also I put tattoos on those two figures on the raft. (look closely at the picture of the figures on the raft and you will see the tattoos)
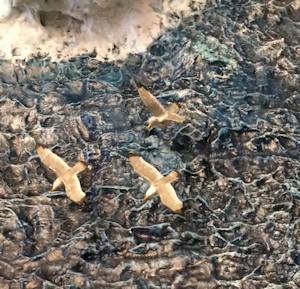
I also add some seagull for a nature effect. (I like to see animal in my dioramas).
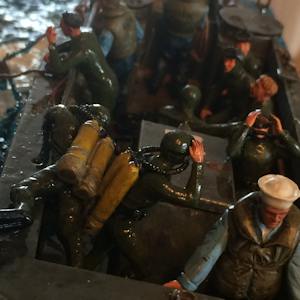
NOTE: One thing I notice about working on boat models such as landing crafts is modelers forget to give these crafts a wet effect. For that I used a clear gloss and slopped it around the boat and onto the frogmen and sailors pants. (See Pictures)
AS for the water effects, I watched YouTube for some pointers, I have to give credit to AKADEMEE and TERRANSCAPES, those videos were helpful as well as Storm the Castle. And also I watched a few Navy SEAL training video from the 1950s and 1960s and watched how the water reacted against the boats for the diorama I was going to build and tried to replicate it as best as I could.
Making The Base
But to start I made my own base by just slapping glue to a piece of wood and a few thin nails. I then placed Styrofoam to size onto the base. I cut a hole to the size and shape of the boat. I also cut a small hole to place my diver some distance away from the boat. I then painted the Styrofoam using Vallejo Atlantic Ocean Blue. Waited 24hrs for the paint to dry.
The Water Effects
The next day I began to add the water effects. I used clear silicone caulk brought in a hardware store. Once I caulked large dabs around the Styrofoam base, I spread the caulk with a butter knife and then process to slap the wet caulk with a spoon from all different directions to give it a wavy effect. I then did it from left to right to give in some organization for if you notice wave near coastal water are usually coming in on some sort of linear degree. i then let it dry for 24hrs. NOTE: When using clear caulk, the caulk is an almond color not clear, but when dried, it becomes clear.
Placing the Boat
On day two I placed the boat and the diver into their spot and began caulking around the boat and into the hole the diver was placed into. The diver was the easy part for most of his body was covered except a foot and upper part of the torso and head. I then procced to sculpt small waves around the diver as if he was treading water.
As for the boat; that was a project. I first had to fill up the gaps in the Styrofoam. Then I started to caulk around the boat and sculpt wave. Let it dry for 6 to 8 hrs.
Once semi- dried, I worked on the front of the boat by making the waves a bit bigger, by overlaying thick amount of caulk on top of the first layers and began sculpting to make the wave to seen like they were crashing against the bow of the boat then spilt in two parts. Just like a ship does when it cuts through water.
I then worked the sides of the boat. I put a good amount of caulk on each side and sculpted it with the waves hitting the side of the boat. I then put several lines of caulk at an angle pulling away from the boat, and shaped the lines into waves pulling away from the boat.
At the stern of the boat, I threw on a large goop of caulk and spread it out, then I slapped it with a spoon to make it look foamy. Let it all dry for 8hrs or more. NOTE: once the caulk is dried, you might have to do a touch up paint job on the water effects. Around the boat I painted it sky blue then touched up with white by drybrushing it. Which came out nice as a bluish - white tint.
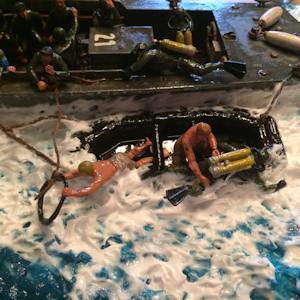
Then came the raft. I watched some frogmen video again and replicated how the water reacted to hitting the raft. I did this by laying the raft next to the boat and surrounded it with a thick glob of caulk. Then sculpted the waves and splashes on to the raft, sailors on the raft and the diver climbing into the raft (see pictures). Let it dry for a some hours and then I lightly painted it sky -blue and immediately hit it with white, which turned it into a bluish white. Overall the water effect took me three or four days.
This project took me three months, but it was worth it. For I recently won a regional modeling show in the diorama category.
Some of the kits that Luis used for this diorama
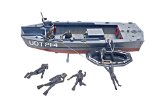
Revell/Monogram UDT Boat with Frogmen -
US Navy Underwater Demolition Team boat vintage kit has single-piece full hull, machine gun pulpits, engine compartment with motor and removable hatch, helm station, deck cleats, side raft pick-up unit, life rings, 3 scuba air tank sets, 5 'Frogmen' in action poses, 2 on-board crew figures and display stand. Completed model is approximately 11" long; ex-Monogram mold released as 1/32 scale. Decals and painting notes for a typical vessel.

Testors/Italeri Radio Operators --
Radio Operators 1/35 Scale Plastic Model Kit. Made by Testors. Marked #846. Recommended for Experienced Modelers Ages 10 and Over. Paint,Cement and Hobby Accessories Required ,but NOT INCLUDED,Needs Assembly. Brand New in Factory Sealed Packaging.

Trumpeter WWII US Navy LCM Crew Figure Set -
The Trumpeter figures series consists of the plastic parts to create 1:35 scale figures of various armies and other military personnel. These kits contain guns, body armor, goggles, and other pieces of equipment worn by military people. The kits do not include paints or glue.
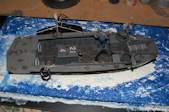
Underwater Demolitions Team (UDT) Boat This is a fantastic little diorama with some easy yet fantastic water effects. You have got to check this one out and see how the water effects are made. The UDT Boat Diorama

Do you like making projects and exploring a variety of hobbies?
Sign up for my free newsletter. I give you regular updates on hobbies and projects you can make. it is totally free and I don't share your email with anybody.
|
![]()


